The intent is to be a functional ElasticStack that is fully collapsible, primarily for Lab or Development usage. This guide presumes the usage of a Windows workstation, but can be easily modified to accomodate Mac/Linux contexts.
Prerequisities (installation steps below):
-
8 GB of System RAM, but 16+ GB is recommended, particularly if you plan to simulate load or development.
-
Visual Studio Code (https://code.visualstudio.com/):
Extensions:
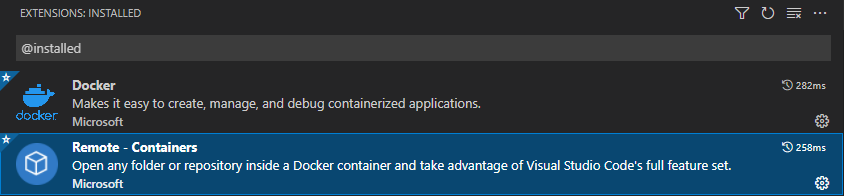
-
Windows Subsystem for Linux / WSL 2
-
Docker Desktop (https://www.docker.com/products/docker-desktop)
Installation:
I personally prefer to use Chocolatey (https://chocolatey.org/) for most of my local install needs, but I'll explain manual methodologies below.
-
Configure and Install Windows Subsystem for Linux / WSL 2:
From an elevated Powershell prompt:
notepad "$env:USERPROFILE/.wslconfig"This will create a blank configuration for WSL to use, tied to your user profile. Please note: this is a very general configuration that affects all WSL distributions, and there are more specific configurations you can potentially explore.
Further documentation: https://docs.microsoft.com/en-us/windows/wsl/wsl-config#wsl-2-settings
I personally set mine to 6GB, as below, but the requirement is for 4GB:

wsl --installThis will run through the install process, potentially requiring a subsequent reboot. Do so if required.
-
Install Git:
Run the installer. Select the following options, taking note of any warnings or notifications that are presented:
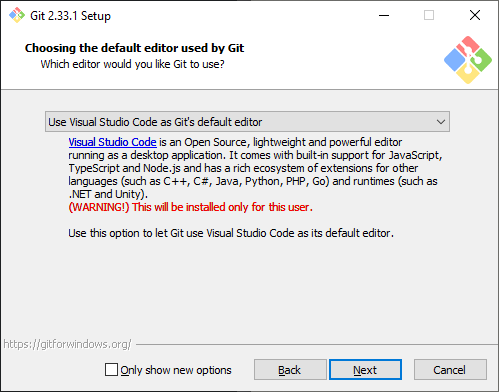
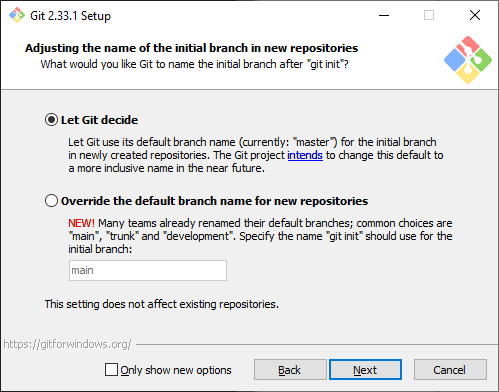
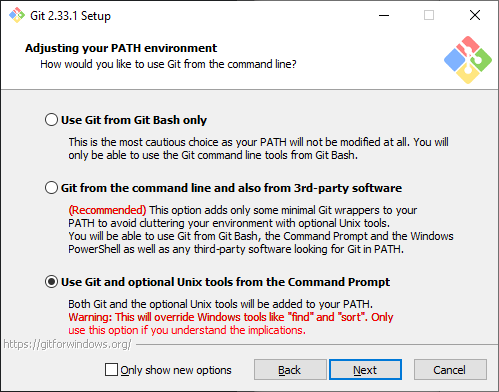
Other options can be chosen at your preference/discretion. I would advise using the Git Credential Manager.
-
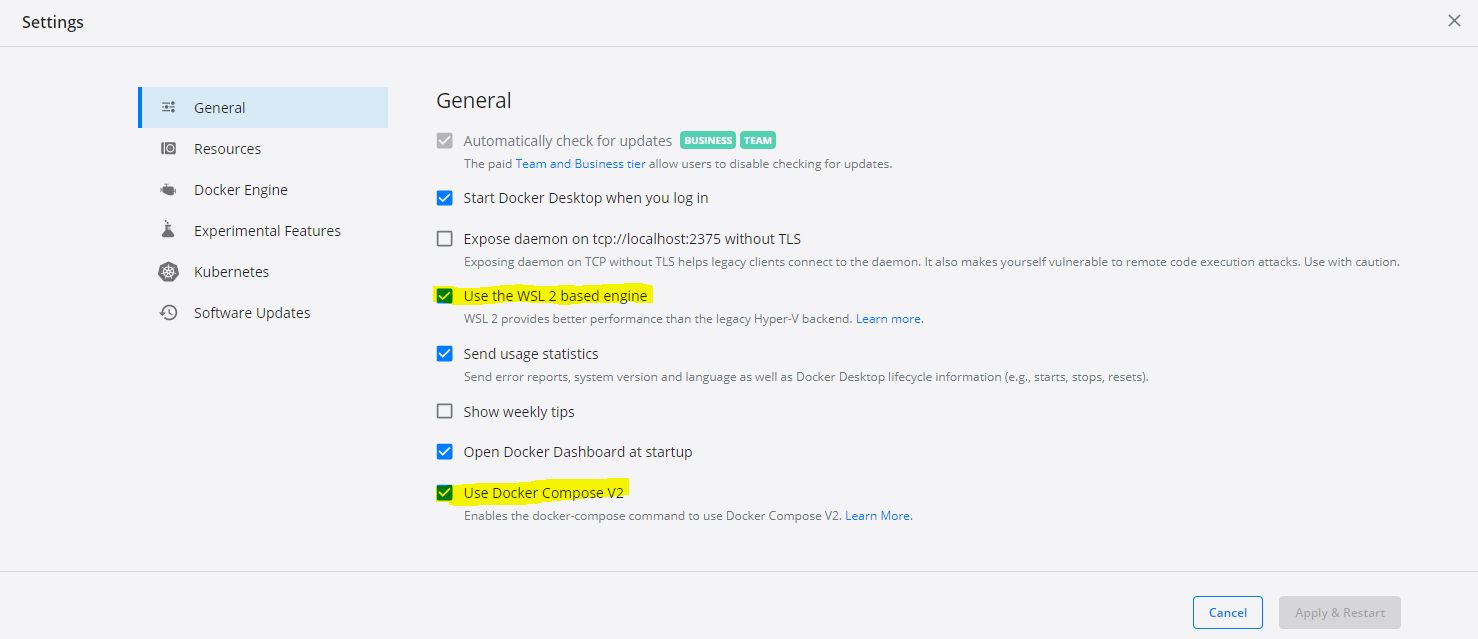
Install Docker Desktop:
Run the installer and proceed through installation. Once installation is completed, validate that Docker has both Docker Compose and WSL2 backend enabled:
Pull down the Docker images:
docker pull docker.elastic.co/elasticsearch/elasticsearch:7.15.1docker pull docker.elastic.co/enterprise-search/enterprise-search:7.15.0docker pull docker.elastic.co/kibana/kibana:7.15.1docker pull vault:latest -
Configure Docker Engine on WSL2 to accomodate minimum memory for VM containers:
wsl -d docker-desktopThis will initate a shell session connected to the Docker Engine running on WSL2. Enter the following command to configure Docker Engine's VM container memory maximum:
sysctl -w vm.max_map_count=262144 -
Clone down the Git repo:
Navigate to a directory of your choosing and clone a copy down:
git clone https://github.com/RCellar/ElasticTest.git -
Build the Certificate Volume and create certificates:
With "ElasticTest" as your working directory:
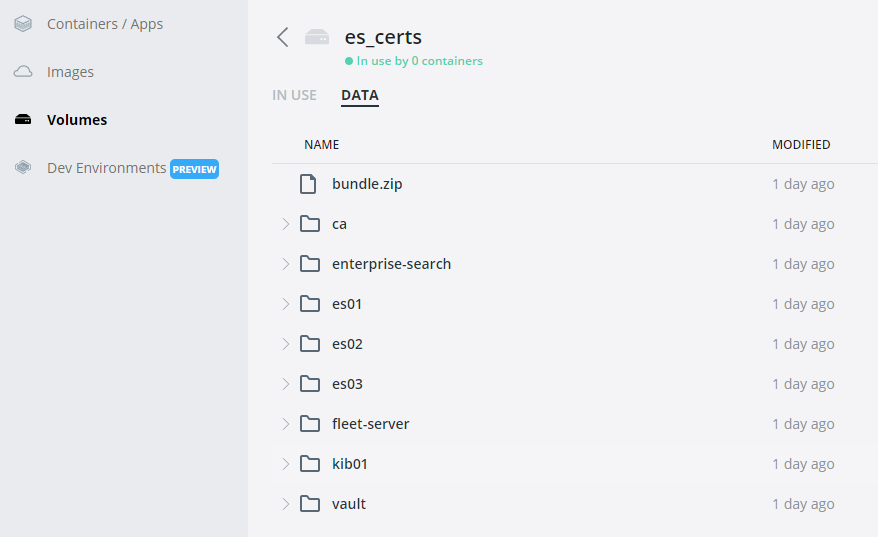
docker compose -f create-certs.yml upThis creates all the certificates that will be used by the container environment we're about to bring online. A single instance of ElasticSearch will come online, create and populate the volume, then turn off. You should see results in Docker Desktop like the following:
Once validated, we can remove the container as it will no longer be in use.
docker compose -f create-certs.yml downThis will remove the containers associated with the runbook, but leave the Volumes behind. (Note: to also bring down volumes, add
-vto the previous command) -
Build the Elastic Environment:
docker compose -f enchilada.yml upThis will create the volumes, network, and containers for use with the deployment. However, you'll note that Kibana will not be able to connect to the ElasticSearch backend. This is because the passwords need to be generated and synced. To do so, execute the following command:
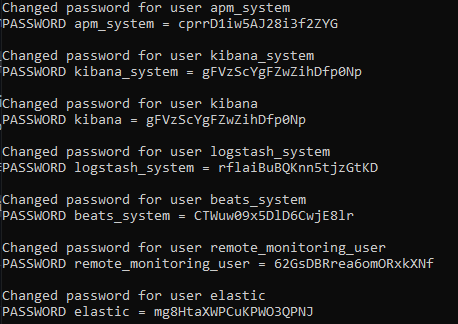
docker exec es01 /bin/bash -c "bin/elasticsearch-setup-passwords \
auto --batch --url https://es01:9200"
It will generate output that looks like the following. Be sure to copy them down (Note: these are randomly generated):
Once generated, we'll need to edit our configuration. Find the
.envfile at the root of the ElasticTest directory and edit the ELASTIC_PASS and KIBANA_SYSTEM_PASS values to reflect the relevant kibana_system and elastic user passwords that the command above generated. It should look something like this: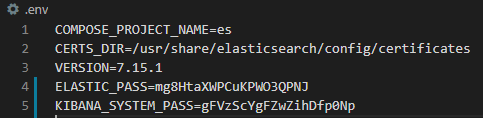
Save your changes, then assert those changes:
docker compose -f enchilada.yml upYou'll see the container nodes will recreate where relevant. At this point you should be able to launch Kibana via https://localhost:5601 and login using the
elasticcredential, using the same credential you should've stored from earlier.
Notes and Current Defects: Enterprise Search integration with Kibana does not currently work due to an issue with the CA cert format, but works as standalone. It can be accessed via https://localhost:3002 .